ADVENTURE HIKES AND CANYONEERING
IN THE SOUTHWEST
© Christopher Earls Brennen

|
|---|

|
Hike G11. Grotto Canyon, Death Valley
- Hiking time: 8.5 hours
- Estimated hiking distance: 7 miles
- Elevation gain: 3300 feet
- Topo Maps: Grotto Canyon, Stovepipe Wells Village
- Difficulties: Five to eight rappels up to 100ft, much downclimbing and some upclimbing, significant route finding
- Special equipment: 200ft rope, 150ft retrieval line, 100ft webbing, 6 rappel rings, rappelling equipment, helmets and leather gloves
-
ACA Rating: 3A IV

Characteristics
Death Valley National Park contains some of the most rugged and fantastic landscape in the world that provides some marvellous adventures and canyoneering experiences. Though the heat in the summer is intolerable, the Park has the advantage that the mild winter weather allows outdoor activity when much of the rest of the southwest is too cold and wintery. While it does occasionally rain in the valleys and snow often covers the high peaks in the winter, at lower elevations the temperatures are perfect for exploring the many narrow, multicolored canyons that line both sides of the flat valley bottom. This collection of adventures contains several in Death Valley National Park. Though the hike to the summit of Telescope Peak is a summer outing, the other, canyoneering adventures included in this collection are best suited for the late fall, winter and early spring. If you plan to do much hiking in the Park, I strongly recommend you buy Michel Digonnet's excellent book "Hiking Death Valley".
This hike takes in two of the most interesting canyons in the park. Mosaic Canyon is both scenically attractive and relatively easy to ascend at least in each lower reaches. We then describe an ascent to the ridgetop between Mosaic and Grotto Canyons and a subsequent descent through the entire length of Grotto. This begins with the upper section which is extremely difficult to access from the bottom of Grotto and is very rarely travelled. The descent involves many rappels up to 100ft in height and travels through some marvellous narrows and grottoes in the lower reaches. It is, however, a long and arduous hike and requires a full day. The ridgetop climb also demands some careful navigation.
Trailhead
This hike requires a short but rough car shuttle with two 4WD vehicles. First deposit a recovery vehicle at the end of the Grotto Canyon access road. From Stovepipe Wells drive 2.4mi east along Highway 190 to where a rough dirt road goes south up the alluvial fan for Grotto Canyon. The turn off (36o36.27'N 117o6.34'W) is not well marked but is the only one in this vicinity. Drive 2.1mi up this dirt road which starts on the fan and ends in the Grotto Canyon wash just downstream of the last narrows. Leaving the recovery vehicle there (36o34.86'N 117o6.22'W), drive back to the highway and west to a point just past Stovepipe Wells where the better graded Mosaic Canyon dirt road branches off to the south. It is 2.1mi up this road to the developed Mosaic Canyon trailhead (this access road is good for all vehicles). Park at this trailhead (36o34.29'N 117o8.66'W).
Hike
A decision needs to made before leaving the Mosaic Canyon trailhead. Perhaps the easiest way to reach the high drop-in point for Grotto Canyon is to proceed directly up the ridge on the left side of Mosaic Canyon. The ridgetop provides the smoothest terrain in this rugged landscape and is therefore the easiest cross-country route. Though the author did not follow this route, it was recommended by the experienced Park Ranger Charlie Callagan who has hiked the ridgetop. If you choose this route then you should access the ridgetop as early as possible and before proceeding too far into Mosaic Canyon. However, we describe here the route followed by the author who hiked up Mosaic Canyon before climbing to the ridgetop.
 | 
| |
|---|---|---|
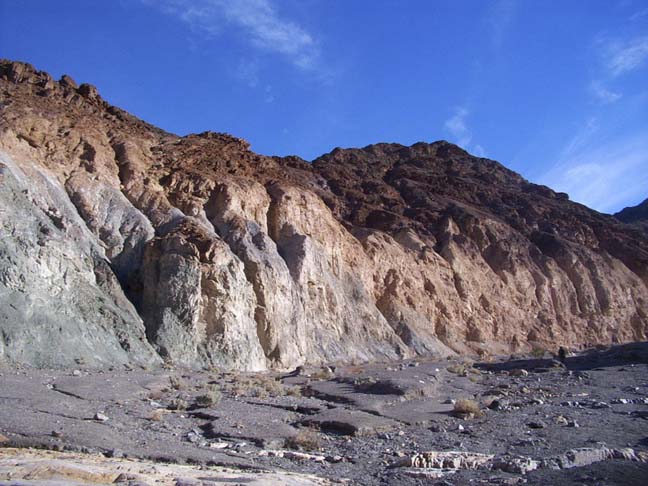
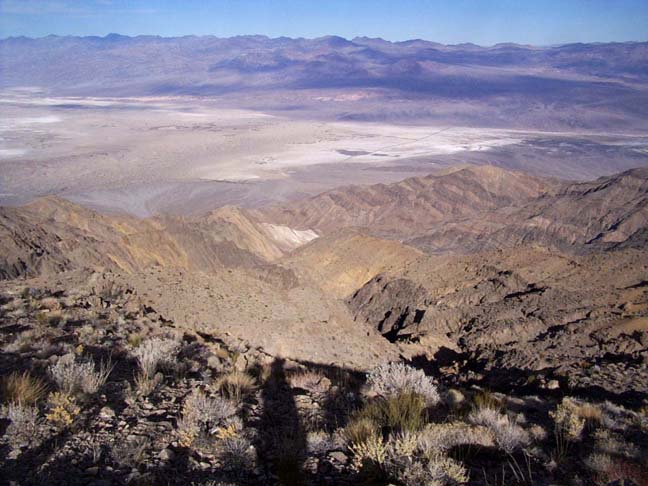
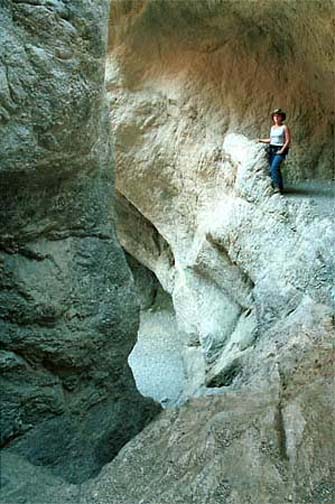
| In lower Mosaic Canyon | View from ridge overlooking Grotto |
From the Mosaic Canyon trailhead (36o34.29'N 117o8.66'W and elevation 950ft) it is just a short walk to the first narrows in Mosaic Canyon. Narrow but not very deep, this first defile is cut through white marble but also features the multicolored mosaic agglomerates that gave the canyon its name. After about 0.4mi the canyon broadens again and the gravel bottom makes for easy hiking. Looking up at the cliffs below the ridgeline on the left you will wonder how you are going to get up there. About 25min from the start at 1370ft you will pass a marble island in mid-wash and shortly thereafter you come to the second narrows. These, in turn, end at an easy 18ft climb up an inclined rock slope with lots of hand and foot holds. You should reach this point (elevation 1700ft) about 40min and 1.4mi from the start.
Another open, gravel-bottomed section follows before you come to the second dryfall, a 25ft drop that can't be climbed. Backtrack about 100yds from the dryfall and look for a use-trail that climbs the slickrock on the left side of the canyon (36o33.51'N 117o7.75'W). This trail becomes a steep ledge trail that bypasses a deep slot in the main drainage just upstream of the 25ft dryfall.
[Note. At the low point where this bypass trail first descends, take note of a side canyon that rises steeply to the east. This canyon, if climbable, might be a quicker route to the ridgetop; we believe we joined this gully for the last section of our climb described below.]
The bypass trail briefly climbs again before descending to a broad wash upstream of the deep slot. Here, at 2100ft, you should be 1hr 20min and 2mi from the trailhead. Just about 100yds up this broad wash there is a fork where a major tributary joins Mosaic Canyon (36o33.37'N 117o7.58'W). Take the left fork and continue hiking up this tributary which has a gravel bottom that makes for easy hiking. About 20min up the tributary at 2450ft there is an 11ft dryfall that is easily climbed. Past this dryfall, keep surveying the left side of the canyon and about an elevation of 3100ft (and 2.8mi from the start) you should see a small, open gully that climbs steeply up to the north, angling up the overhead cliff. Leave the canyon bottom and start up this steep gully (36o33.09'N 117o7.09'W). Some distance up where the streambed encounters a 10ft dryfall, you can climb the steep rock to the left of the streambed and proceed through a gap to the point where the gully tops out at 3620ft. This last section needs care for the rock is very loose and fragile. Where the gully tops out you transition into a much larger gully which seems to be the same as the one noted earlier that could be entered from the bypass trail. Continue up this larger gully which provides safer and easier climbing. Fork left at the only major junction and you should top out of this gully at the bottom of a scree slope that leads, finally, to the ridgetop. You should reach the ridgetop (36o33.39'N 117o6.92'W and elevation 4300ft) about 4hrs from the start having travelled about 3.6mi from the start.
 | 
| |
|---|---|---|
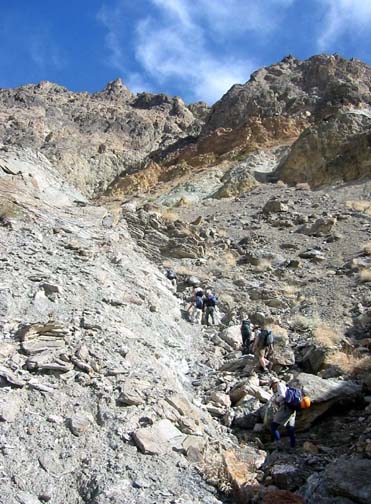
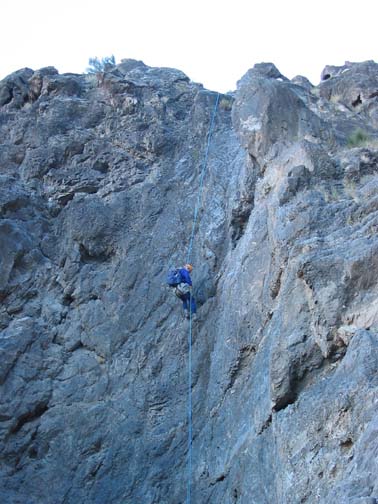
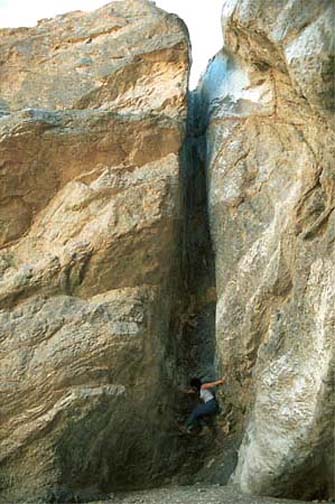
| Climbing out of Mosaic | Rappelling down the nose in Grotto | |
(Photos by Ira Lewis and Nathan Wozny) | ||
The ridgetop is a good place for a lunch break for the view is spectacular. Looking north you are treated to an overview of the forks of Grotto Canyon and you can visually follow these all the way to where Grotto exits the mountains with a large alluvial fan. The road north of the fan is busy with tourists visiting the sand dunes which look like small ripples from this vantage point. The salt flats of the valley bottom shine in the sun and everywhere in the distance are the burnt mountains of Death Valley National Park.
When ready to resume, you should take careful stock of your location in order to drop into Grotto at the right point. The route described above should bring you to the ridgetop above the best drop-in point. Hike back down the ridgeline to a saddle at an elevation of just under 4000ft where you should find the head of a broad canyon with a moderately steep but easy entry (36o33.63'N 117o7.08'W). This saddle is close to a ridgeline junction: the main ridgeline turns east just beyond the saddle and the ridgeline from the Mosaic Canyon trailhead comes up to here from the west. Just to the west of the saddle there is a broad open area that is unusual in this steep terrain.
The descent into this west fork of Grotto Canyon is steady and easy, the terrain in marked contrast to the cliffs on the Mosaic side of the ridgetop, the rock much more solid and mixed here with low brush. After a long descent to 3200ft (4.1mi from the start) you come to a big drop-off consisting of two steep canyons on either side of a prominent rock nose. Hike down the nose for about 100ft and then veer to the left side. Here we rappelled down 100ft to the base of the nose using a boulder anchor. You should reach the bottom of the nose about 5hr 30min from the start. Continuing down the streambed at 2850ft you will encounter a 50ft rappel from a boulder anchor and, about 200ft below that, a small 20ft rappel from another boulder anchor.
The rough, rocky descent continues until, at about 1900ft and 7.5hrs from the start, you come to a substantial drop-off where the streambed first descends four steps in a polished rock gorge before arriving at a large ledge. The first three steps are quite awkward, being about 10ft without few hand or foot holds and no easy anchors. The best strategy is for the best climber to belay the rest of the party and then spot him/her as they climb down or jump. The last step before the ledge is easily downclimbed over the right side. These descents bring you to a large ledge that overlooks a broad, rock-walled bowl that may be Digonnet's amphitheater though our altitude location was quite different. On the ledge we encountered a dramatic scene, the skeletons of a big horn sheep and a bobcat that seemed to have died together at the bottom of a cliff. To descend from the ledge there is a large boulder on the right side that anchors a 60ft rappel down to the floor of the amphitheater. Downcanyon from here the floor consists of long sections of gravel between the drops and narrows.
 | 
| |
|---|---|---|
| 80ft dryfall | Last narrows | |
(Photos by Lewis Shorb) | ||
Shortly after the amphitheater a large canyon comes in on the right. After this be on the lookout for a very neat slot canyon through polished granite that also enters on the right just 30yds upstream of the next rappel. You should arrive at this next rappel at an elevation of about 1650ft roughly 8hrs from the morning start. It is a neat 30ft drop into a polished slot with a narrow exit at the bottom. There is an established webbing anchor here in a recess in the left wall of the canyon. This rappel can also be bypassed on the left using a ledge that leads to a faint ducked trail down a steep scree slope. More gravel flats then lead to another interesting section of narrows containing two drops, one 8ft downclimb followed by a awkwardly undercut 12ft drop for which there is a piton and nut anchor in the left wall. After the canyon broadens again, you arrive at 1350ft at the head of a 80ft deep slot (36o34.55'N 117o6.04'W) that can either be rappelled or bypassed. The long bypass of the narrows downstream of this 80ft drop is up on a shelf on the right where a trail takes you down to a side canyon and hence back to the main wash. From here it is only a little distance to the short, last narrows that are wonderfully contorted. They contain two significant drops, both downclimbs with a belay. The first is an 8ft drop with overhang, the second is a sloping 12ft drop.
From this last descent it is just 50yds before the canyon broadens
and you turn right to find the recovery vehicle
(36o34.86'N 117o6.22'W and
elevation 780ft).
The total duration for the hike should be about 8.5hrs and the
distance covered about 7mi.
Last updated 11/30/04.
Christopher E. Brennen