ADVENTURE HIKES AND CANYONEERING
IN THE SOUTHWEST
© Christopher Earls Brennen

|
|---|

|
Hike G7. Bad Canyon, Death Valley
- Hiking time: 8 hours
- Estimated hiking distance: 6.4 miles
- Elevation gain: 230 feet
- Topo Maps: Dantes View, Badwater
- Difficulties: Nine or ten rappels, three between 150ft and 200ft, some anchor challenges
- Special equipment: Two 200ft ropes, 200ft retrieval line, 200ft webbing, a few pitons and nuts, hammer, 10 rappel rings, rappelling equipment, helmets and leather gloves
-
ACA Rating: 3A III

Characteristics
Death Valley National Park contains some of the most rugged and fantastic land in the world. That wonderland provides some marvellous adventures and canyoneering experiences. Though the heat in the summer is intolerable, the Park has the advantage that the mild winter weather allows outdoor activity when much of the rest of the southwest is too cold and wintery. While it does occasionally rain in the valleys and snow often covers the high peaks in the winter, at lower elevations the temperatures are perfect for exploring the many narrow, multicolored canyons that line both sides of the flat valley bottom. This collection of adventures contains several in Death Valley National Park. Though the hike to the summit of Telescope Peak is a summer outing, the other, canyoneering adventures included in this collection are best suited for the late fall, winter and early spring. If you plan to do much hiking in the Park, I strongly recommend you buy Michel Digonnet's excellent book "Hiking Death Valley".
Perhaps the most rugged adventure hikes in Death Valley are those that drop down from the tops of the Black Mountains all the way to the area south of Badwater. This Bad Canyon hike involves a 6000ft descent from Dante's View (elevation 5475ft) to the valley bottom just south of Badwater. The asphalt road to the popular scenic viewpoint known as Dante's View ascends the eastern slopes of the Black Mountains and provides a quite dramatic vista overlooking Badwater only 2.5mi away as the crow flies. On a sunny day, the view is otherworldly with the glistening salt in the valley bottom contrasting with the red and gray crags and cliffs of the slopes below you. From Dante's View it seems almost impossible to make that descent because cutting longitudinally across the direct route are the great chasms of Hades Canyon and, a little further away, Bad Canyon. But by hiking north along the ridge on which you stand, you can find a way to descend into Bad Canyon and then follow its tortured streambed all the way to Badwater. However, that canyon bottom route is interrupted by many dramatic dryfalls, nine of which require rappelling. One of those rappels descends a jaw-dropping, 180ft vertical drop and two others measure more than 150ft. It is an adventure that is only for the fit and experienced canyoneer. Because there are no trees in this landscape, finding safe anchors is challenging in some places and you should take a variety of technical anchoring gear such as nuts and pitons as well as a large quantity of webbing.
Trailhead
The Bad Canyon descent requires a long car shuttle. Perhaps the best base for this adventure is one of the campgrounds at the Park center in Furnace Creek. From there, the evening before the hike, you should drive south to Badwater (17mi away along Highway 178) in two vehicles in order to park the recovery vehicle in the parking lot at Badwater (36o13.78'N 116o46.05'W). Then, before dawn on the day of your hike, you should drive southeast on Highway 190, climbing gradually along the Furnace Creek Wash between the Amargosa and Funeral Mountains. Ten miles from Furnace Creek, turn right onto Dante's View road and follow this for 13mi to the vista point. There are restrooms just before you reach the viewpoint and plenty of parking at the top. The Dante's View trailhead coordinates are 36o13.25'N 116o43.61'W and its elevation is 5475ft.
Hike
It is best to time your start to begin the hike just after sunup since the 10hrs of winter daylight does not leave much room for delay during the descent. Begin by hiking due north along the trail from the parking area (elevation 5475ft) to Dante's Peak (elevation 5704ft) just 0.4mi away and 230ft higher. Pause at the Peak to drink in the fantastic view. Then continue along the easy use-trail on the ridgetop, passing another small highpoint before descending toward a saddle at 5210ft, some 1.3mi and 37min from the parking lot. At about 5230ft just before you get to the lowpoint of the saddle you should be able to discern a low ridge that leads down to the west to a flat gravel wash about 500ft below you. There is a small rocky outcropping on this ridge about a third of the way down. Follow the ridge all the way down to the wash (elevation 4720ft). You should reach the wash about 50min after starting out. Then follow the wash for about 500yds until you reach a pour-off. Climb onto the low shoulder to the left of the wash and turn right to hike down in a northerly direction into the next gully. Once down at the head of this gully, hike up onto the ridge beyond the head. On the top of this ridge you should discern a steep but negotiable slope down into the wash of Bad Canyon itself. It is about a 200ft drop into Bad Canyon and you should reach the wash (elevation 3960ft) about 1hr 25min from the start having travelled about 2.5mi. The roughest part of the descent has now been completed for the rest is a combination of easy gravel hiking, downclimbing and rappelling.
|
|---|
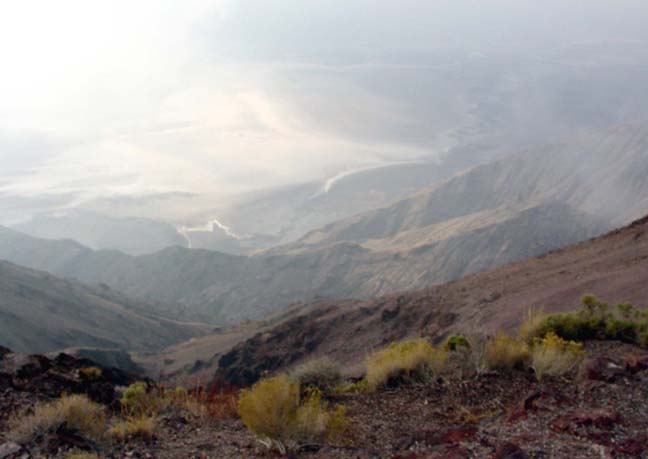
| Morning from Dante's View |
(Photo by Mark Duttweiler) |
The next 0.7mi is a straight and easy walk down Bad Canyon wash. As you go, look up at the high, looming cliffs on the left to appreciate why you took the long detour north to access Bad Canyon. Also look ahead of you and you will see that the canyon makes an abrupt right turn. Straight ahead at this turn there is a clearly visible earthquake fault where the movement of the earth created a notable offset. This is the Hades fault that follows the line of Bad Canyon down to the sharp right turn and then proceeds over the ridge into Hades Canyon which it then follows down to the valley. You may wish to take a brief side trip and hike up this linear feature to the ridgetop where the fault has created a square notch. From there you get a good view down the rugged Hades Canyon. That canyon constitutes another canyoneering challenge.
 | 
| |
|---|---|---|
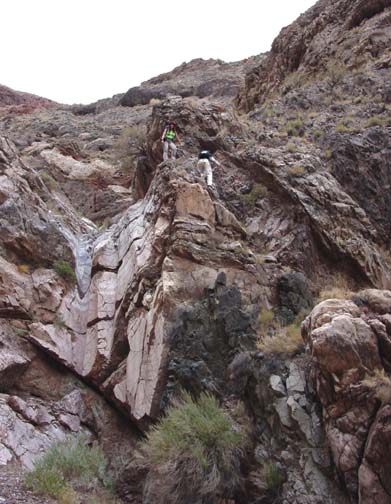
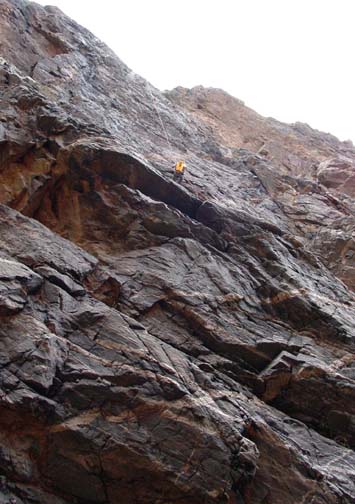
| Steep descent into Bad | First dryfall | |
(Photos by Mark Duttweiler) | ||
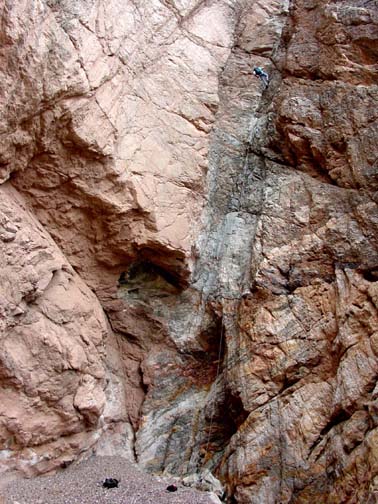
After passing the Hades Fault and sharply turning right (36o13.99'N 116o44.08'W), the canyon narrows and you come to the first dryfall, a vertical 25ft drop at an elevation of 2960ft. This is relatively easily passed by following a narrow ledge just to the left of the lip that takes you to the top of an easy downclimb. Here you are 3.2mi and 1hr 50min from the start. The easy gravel hiking resumes downstream of this dryfall and a few minutes later you come to a second 25ft dryfall that is bypassed on the right by climbing up and over the shoulder to access the downclimb in a gully. Another 30min of fast gravel hiking brings you to the first rappel, an 80ft vertical dryfall at an elevation of 2400ft. You should reach this point about 2hr 40min from the start. The anchor for the 80ft rappel is a ground level chockstone behind the large rock prominance in the middle of the lip. Use an extended piece of webbing to set the rappel ring near the lip of the rappel for an easier rope recovery. This rappel is immediately followed by a short 20ft drop rappeled using a boulder anchor on the right. Not far downstream, at an elevation of 1800ft and 4.6mi from the start, you abruptly arrive at the top of a huge, narrow, jaw-dropping abyss. The bottom, barely visible, is about 200ft vertically below you. At the point where you first arrive at the lip there is little in the way of anchor possibilities. Instead you should continue straight on along the top of the left side of the ravine, descending to a large rock projection that can be slung with a long piece of webbing for the rappel anchor. From here, the bottom of the ravine is not visible, but it is a spectacular, 180ft rappel down a sheer cliff to the narrow slot floor. You should reach this 1580ft elevation (4.6mi from the parking lot) about 3.5hrs after the morning start.
 | 
| |
|---|---|---|
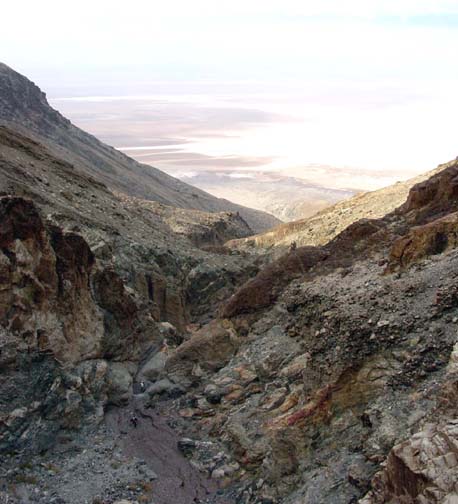
| 180ft rappel | View from 120ft dropoff | |
(Photos by Mark Duttweiler) | ||
Immediately downstream of this great rappel, you will encounter a 30ft dryfall in the narrow slot floor. Though almost downclimbable, this dropoff has only one anchor possibility, a small round rock wedged in a crack in the left wall. Here a good strategy is for the best climber to add his/her body belay to the wedged-rock anchor, to allow the others to rappel or downclimb with that belay and then for the climber to downclimb it with a bottom belay using the wedged-rock anchor alone. From there it is a brief gravel hike to a short polished chute that, at the bottom, needs either a top belay or a long jump. Let a young jumper provide the belay for the rest of the party and then jump last. Just 50yds downstream of the short chute you come to another dramatic dropoff where the canyon broadens temporarily. From your perch at the top of this cliff there is a great view of the distant salt flats in the valley bottom and of the continuing, twisting narrows of Bad Canyon. Here you could rappel the 120ft vertical drop but to do so you would need to build a deadman anchor with the large boulders near the lip. We chose the alternative, an easy downclimb on the left: proceeding up and over the shoulder on the left you can descend into a side gully that can be downclimbed all the way to the bottom. You should reach this point (elevation 1240ft) just under 5hrs from the morning start.
Though the bottom is broad and open, the streambed immediately drops 60ft vertically into a narrow slot. The anchor for this rappel is a large boulder about 10yds upstream of the lip. The streambed makes a sharp right turn at the lip making for an awkward rope retrieval. Moreover, the lip on the inside of this bend is severely undercut, making for a challenging rappel entry. Below this rappel there are two easy downclimbs before you arrive at a 40ft sloping dropoff. This can be downclimbed on the right though with some exposure; or it can be rappeled using a nut anchor in a slot on the left side of the lip. Then, following a short gravel hike, you arrive at the top of another awesome 150ft deep and narrow ravine. The boulder anchor for the rappel descent following the streamcourse is about 25ft back from the lip and you need a webbing extension to a point much closer to the lip in order to effect a comfortable rope retrieval. It is a marvellous 150ft rappel down into a deep chasm with a gravel floor. You should reach this 640ft elevation just under 6hrs from Dante's View.
 | 
| |
|---|---|---|
| 150ft rappel | Deep in the narrows | |
(Photos by Mark Duttweiler) | ||
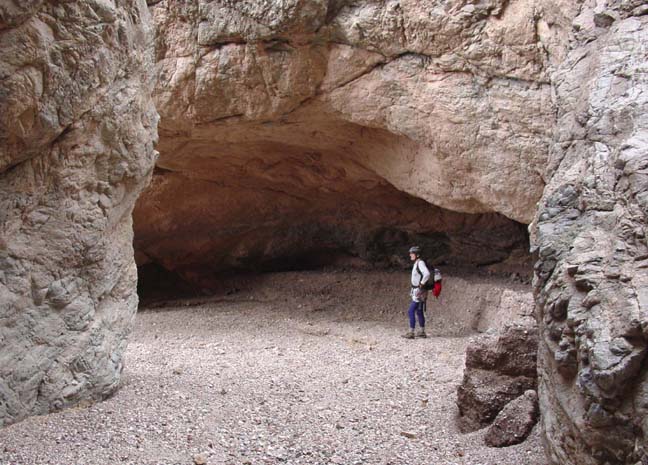
From the bottom of this rappel, a short hike brings you to a vertical 40ft dropoff in a cavernous and winding section of the narrows. A solid nut in a crack on the left wall plus a webbing wrap around a wedged boulder in the floor at the bottom of the left wall should be webbed together to provide a backed-up anchor for the 40ft rappel. This is followed almost immediately by a steep 20ft downclimb on the left side of the narrow slot canyon and, immediately, by the last rappel. This milestone (elevation 570ft) is about 5.3mi from Dante's View and should be reached after 7hrs of hiking.
The last rappel is a two-stage affair using a good deadman anchor in the streamcourse just upstream of the lip (check the deadman carefully in case it has shifted). The first stage is a 10ft drop onto a broad, flat platform followed by a 40ft drop down a steep sloping face to a gravel bottom. Looking back up at this drop you will note the prominent crack about 6ft to the right of the streamcourse that Digonnet climbed to access the narrows above this last rappel.
You can now pack away your harness and helmet for the rest of the way is
easy hiking on gravel. The canyon gradually broadens, winding a bit
before the last long and straight section. The vertical walls here are
comprised of loose compacted sediment with a sprinkling of big boulders,
just what you might imagine would be the consequence of debris flows.
Indeed some of the partially exposed boulders are huge and seem ready
to plunge down the vertical walls. The last straight section seems
endless but the view of the valley floor ahead of you is intriguing,
the salt flats of Badwater glistening brightly in the sun.
Stay to the right side of the broad canyon as you approach the mouth. This
is just about at sea level and 6mi from your starting point now
high overhead.
At the mouth (36o13.52'N 116o46.26'W)
you will note the huge alluvial fan that spreads out over
a half mile radius in all directions. Turn sharp right following
a shallow gully in the alluvial fan and the Badwater parking area will soon
come into view. It is a straight hike down the gentle gravel slope to the
parking lot and your recovery vehicle. You should reach the parking lot
(36o13.78'N 116o46.05'W, elevation -270ft
and 6.4mi from the start) just under
8hrs from the morning start. It is a 17mi drive north
along highway 178 to your base back at Furnace Creek.
Last updated 11/20/03.
Christopher E. Brennen